
Your first bot
Create a TypeScript bot that appears in Monky and responds to /ping. This path is for developers; if you only want to add or use an existing bot, go to Use bots.
The Monky bot SDK (@monky/bot-sdk) connects your bot's process to the server. You write the logic; Monky renders native commands, forms and controls, validates permissions and routes responses.
Before you start
- Use Node.js 22 or 24 and npm.
- Have a test Monky server and permission to manage its bots.
- The server accepts bots from protocol 24 (
MIN_BOT_PROTOCOL) and only enables the features both sides advertise. A new SDK feature needs a server that offers it too. - Check
monky-compatibility-<version>.jsonin the selected release before connecting. The assistant does not change the protocol or update your server.
Why does the first example use a token?
Manual mode lets you test without exposing an HTTP port for the bot. It does not automatically approve permissions. To distribute your bot through a manifest URL, continue with Connection and identity.
Install the tools once
There is no need to find a .tgz URL, choose a tag manually or prepare package.json and TypeScript. The installer finds the official SDK release, verifies SHA-256 and installs monky-bot-sdk per user, without administrator access, in a dedicated directory.
Explicit beta channel
The examples below include --beta to offer the new assistant while it is available only in beta releases. Without that option, the installer chooses stable. If the release does not offer the assistant yet, installation is refused without replacing a previous installation; the channel never changes silently.
& ([scriptblock]::Create((Invoke-RestMethod https://monkyorg.github.io/Monky/install-bot-sdk.ps1))) --beta --locale en-UScurl -fsSL https://monkyorg.github.io/Monky/install-bot-sdk.sh | bash -s -- --beta --locale en-USOpen a new terminal and run:
monky-bot-sdkOn the first interactive use, choose Português (Brasil) or English (US). The menu offers project creation/opening and settings. Inside a bot directory, it also offers adding features, compiling, checking, packaging and opening the runtime manager.
The installer requires Node.js 22+ and npm; Linux/macOS also require Bash and curl, but not GNU grep. It uses %LOCALAPPDATA%\Monky\BotSdk on Windows and ~/.local/share/monky-bot-sdk on Linux/macOS. It adds the installation to the Windows user PATH or the appropriate Bash/Zsh/POSIX profiles, preserving their existing contents. --prefix DIR chooses another dedicated destination; --no-path changes neither PATH nor profiles and prints the full command.
Rerun the installer to update the tool. --version VERSION chooses a specific release without constructing URLs. Updating the CLI does not update the SDK in existing projects. Each project keeps its copy in vendor/ and its lockfile; project commands use the SDK installed in that project.
1. Create the project
Choose Create a new bot in the assistant or run:
monky-bot-sdk create my-bot
cd my-bot
The assistant asks for the directory, package/CLI name, name displayed in Monky and initial features. Use arrows/Enter to choose and Esc to cancel. By default, it installs dependencies and compiles. Everything is already prepared:
my-bot/
  package.json
  package-lock.json
  tsconfig.json
  README.md
  .gitignore
  vendor/
  src/
    index.ts
    bot.generated.ts
    commands/
      ping.ts
src/index.ts handles connection and shutdown; /ping lives in an editable module and provides PT-BR/EN replies per reader. src/bot.generated.ts connects commands, settings and capabilities. Edit the modules, not this registry. Commit the sources, vendor/, package.json and package-lock.json.
The destination must be new; even an existing empty directory is not overwritten. --no-install only generates files, without a lockfile; run npm install and npm run build afterwards. Cancelling the questions does not create a project. If installation/compilation fails, files remain available to fix the cause, without a success message.
For automation without questions:
monky-bot-sdk create my-bot --name my-bot --display-name "My Bot" --non-interactive2. Add features
Run monky-bot-sdk add to choose everything in the assistant or provide the kind and name. Files are integrated into the project, not merely copied:
| Command | Generated feature |
|---|---|
monky-bot-sdk add command greeting | An editable command with PT-BR/EN replies |
monky-bot-sdk add form signup | A command opening a private form, with fields chosen in the assistant |
monky-bot-sdk add selector choice | A private or public selector, with choices supplied in the assistant |
monky-bot-sdk add settings | One settings declaration for the server and individual users |
monky-bot-sdk add screen panel | A voice-stage miniapp translated using each viewer's language |
Parameters can also be explicit for noninteractive use:
monky-bot-sdk add form signup --field name:text --field age:integer --field notifications:boolean --field "role:select:Reader,Editor" --non-interactive
monky-bot-sdk add selector poll --public --choice "Option A" --choice "Option B" --non-interactive
Fields accept text, integer, boolean, string-list, image-list and select:ChoiceA,ChoiceB. The sample form only acknowledges submission; implement your behavior using values. Translate author-written titles and labels in the module using ctx.locale; the generator does not invent translations. image-list lets a person select, crop, preview, reorder and upload up to five carousel images at once. Use presentation to choose format (banner, landscape, square or portrait), fit (cover or contain) and size (compact, regular or wide). Sizes are responsive hints bounded by the client; bots cannot provide CSS or arbitrary dimensions. The field returns opaque temporary references. Use them in a ctx.reply() component or as a Live Action's imageAssetRefs; in the latter case the server promotes the images to persistent imageUrls. This field is not supported in persistent settings. The settings module declares options and their defaults; implement their effects in handlers using ctx.settings.server and ctx.settings.user.
Selectors default to private in automation; --public creates a public poll lasting five minutes, with up to 50 participants and changeable votes. The example does not wait for the whole poll inside its handler. The miniapp requires voice membership, uses commands/miniapps, not publish_voice, and does not include CDNs, computer access or secret state.
The generator rejects conflicting names/files, multiple settings modules, links in managed paths and manual registry edits. Metadata lives in package.json.monkyBotDevelopment. Older or handwritten projects still support build, doctor and cli, but add does not migrate them; it requires the managed structure created by this version.
After editing:
npm run build
monky-bot-sdk doctor
npm run package
doctor checks Node/npm, dependencies, protocol, compiled entry and types, without starting a bot, creating an identity or connecting to a server. build produces the self-contained package described in Distribution. --root DIR works with add, doctor and build; there is no dev command.
Packaging the SDK, the SDK pinned by create, and the bot preserves shared dependency instances, including those used by voice certificates. Distinct versions or installations remain separate. If this resolution cannot be preserved, packaging fails explicitly instead of producing an archive that only fails when voice starts.
3. Link and start
- In Monky, open server name → Server Settings → Bots.
- Open Show advanced option and generate a manual link.
- Copy the token shown only once.
In the project terminal:
npm run build
npm run cli -- setup
npm run cli -- start --foreground
In setup, enter the server address, token and bot name. For a server on the same computer, localhost:3000 is an example; use the actual port. Enter the token in the assistant's hidden input, not as a shell argument. --foreground keeps the process in that terminal without creating a PM2 daemon.
4. Approve and run
In the client, open Bot settings → Permissions, enable the requested commands capability and any other capabilities requested by the features you added, then save. Being online does not replace this approval.
In a text channel that allows bots, type /, select the bot and run /ping. The response should appear only for the caller.
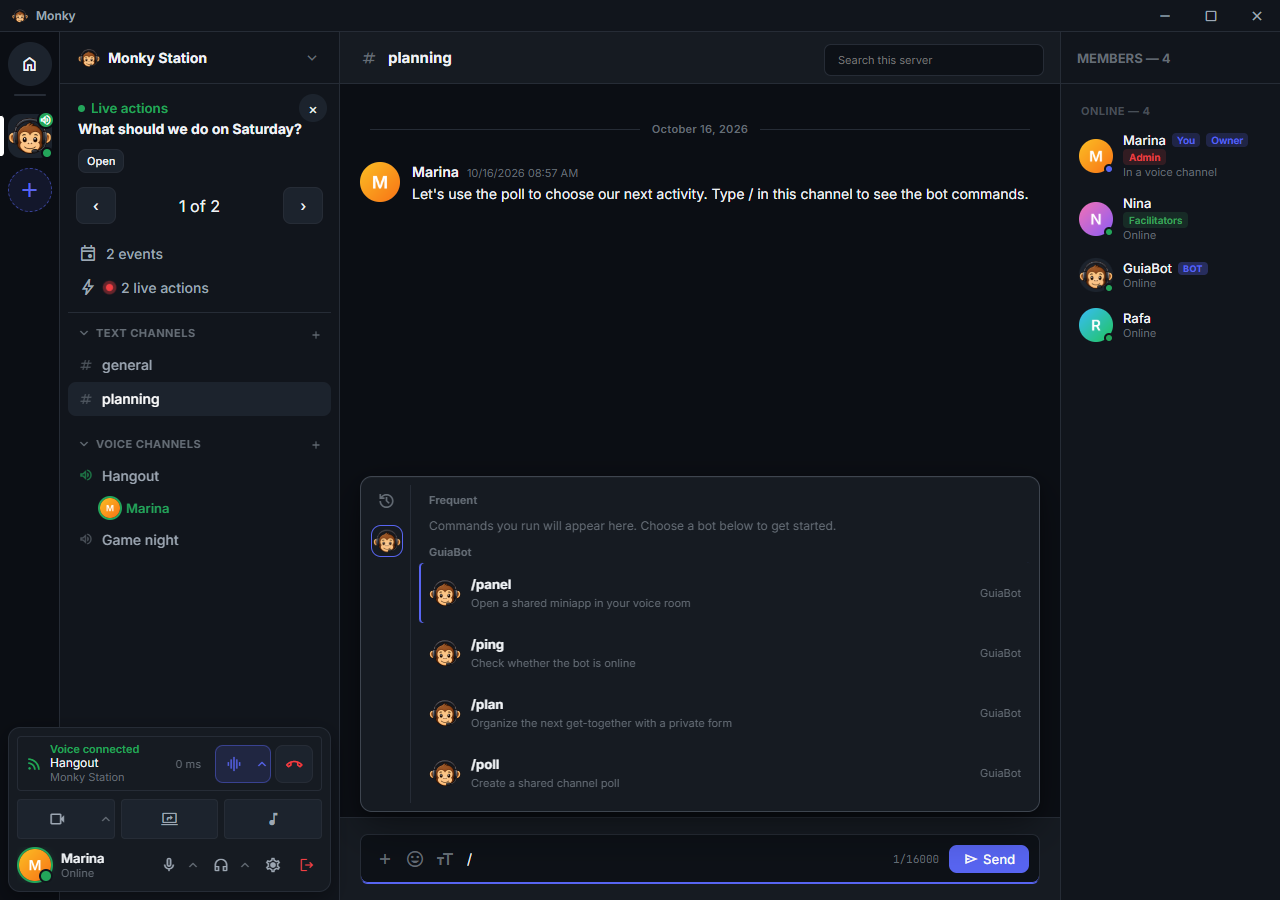
If the bot is online but /ping is missing
Check capability approval, your role's permission and the channel's Allow bot commands switch. The diagnostic guide separates these cases from connection and protocol failures.
Languages and settings
In the SDK, open Settings → Idioma / Language or run:
monky-bot-sdk config language pt-BR
monky-bot-sdk config language en-US
The next menu uses the new language, saved in ~/.monky-bot-sdk/preferences.json. MONKY_BOT_SDK_HOME changes only this profile for testing. --locale pt-BR|en-US applies to one invocation; en remains an accepted alias. Menus are not opened without a TTY or in CI.
The bot runtime manager has its own preference:
npm run cli -- config
npm run cli -- config language en-US
It does not silently inherit the SDK's saved preference. Changing its language does not recreate identity or change the connection, token or permissions. The server CLI also supports monky config language pt-BR|en-US; see CLI. These terminal preferences do not change the language participants selected in the application.
What you can build
| Feature | Guide with examples | Main capability |
|---|---|---|
| Typed parameters, translations and paginated autocomplete | Commands | commands |
| Private forms and multi-step questions | Interactions | commands |
| Public messages, reactions and persistent polls | Interactions | send_messages, read_messages and/or selectors, depending on the operation |
| Live actions with native forms and selectors | Live actions | commands and live_actions |
| Personal preferences and per-server behavior | Settings | Server scopes and permissions |
| Audio previews and Soundboard downloads | Audio | commands; downloads also require sound_download |
| Publish P2P or SFU audio | Voice | publish_voice |
| Receive P2P or SFU microphones | Voice reception | receive_voice and connection opt-in |
| Authorized tasks on the user's computer | Local execution | local_execution |
| Shared HTML screens in voice rooms | Miniapps | miniapps |
| Bot data on the server and on computers | Storage | server_storage and/or device_storage |
| CLI, installable package and updates | Distribution | Package configuration |
Add only the capabilities you need to requestedCapabilities. Grants require administrator approval; adding a feature does not silently authorize an already installed bot.
How to use the documentation
The guides explain when and how to use each feature. The bot SDK reference covers return values, events and lifecycle, with links to the complete signatures of every public export.
Feature-guide examples extend the bot instance from this tutorial. Declare commands and settings before connecting. When an example uses a variable such as serverId, obtain it from SDK contexts or events — do not invent an ID or use the server's name.